Trezor.io/Start | Securely Set Up Your Trezor Hardware Wallet
Introduction
In today’s digital age, cryptocurrency ownership brings both freedom and responsibility. You have the power to control your assets without relying on third parties—but you also carry the duty of keeping them safe. That’s where your Trezor hardware wallet comes in. A hardware wallet is widely considered one of the most secure ways to store cryptocurrencies. Unlike software wallets, it keeps your private keys completely offline, making it far less vulnerable to hackers, malware, or phishing scams.
This guide will walk you through the entire Trezor setup process—from unboxing your device to sending your first transaction—while giving you expert tips to ensure your funds remain protected at all times. Whether you’re setting up your first crypto wallet or upgrading your security from an exchange or software wallet, you’re in the right place.
1. Understanding Your Trezor Hardware Wallet
Before you start the setup process, it’s important to understand exactly what Trezor does and why it’s different from other storage solutions.
Cold storage: Trezor stores your private keys offline, away from internet-connected devices.
PIN and passphrase protection: Even if your Trezor is stolen, without your PIN or optional passphrase, it remains useless to thieves.
Recovery seed: This is a backup that allows you to restore your wallet if your Trezor is lost or damaged.
Compatibility: Works with Bitcoin, Ethereum, and hundreds of other cryptocurrencies.
There are two main models:
Trezor Model One: The original, affordable option with essential features.
Trezor Model T: Premium model with a touchscreen and added coin support.
2. Unboxing and Verifying Your Device
Security begins the moment you receive your Trezor.
When you open the box:
Check the packaging: It should be sealed and intact. Look for any signs of tampering—scratches, broken seals, or mismatched colors.
Confirm authenticity: Ensure the hologram security seal is undamaged.
Inspect the contents: Your box should include the Trezor device, a USB cable, recovery seed cards, and an instruction sheet.
Tip: If anything looks suspicious, stop and contact Trezor’s support team before proceeding.
3. Preparing for Setup
Before you plug in your device, get these ready:
A clean, malware-free computer.
A stable internet connection.
Pen and paper for writing down your recovery seed.
A quiet, private space where no one can see your screen or seed.
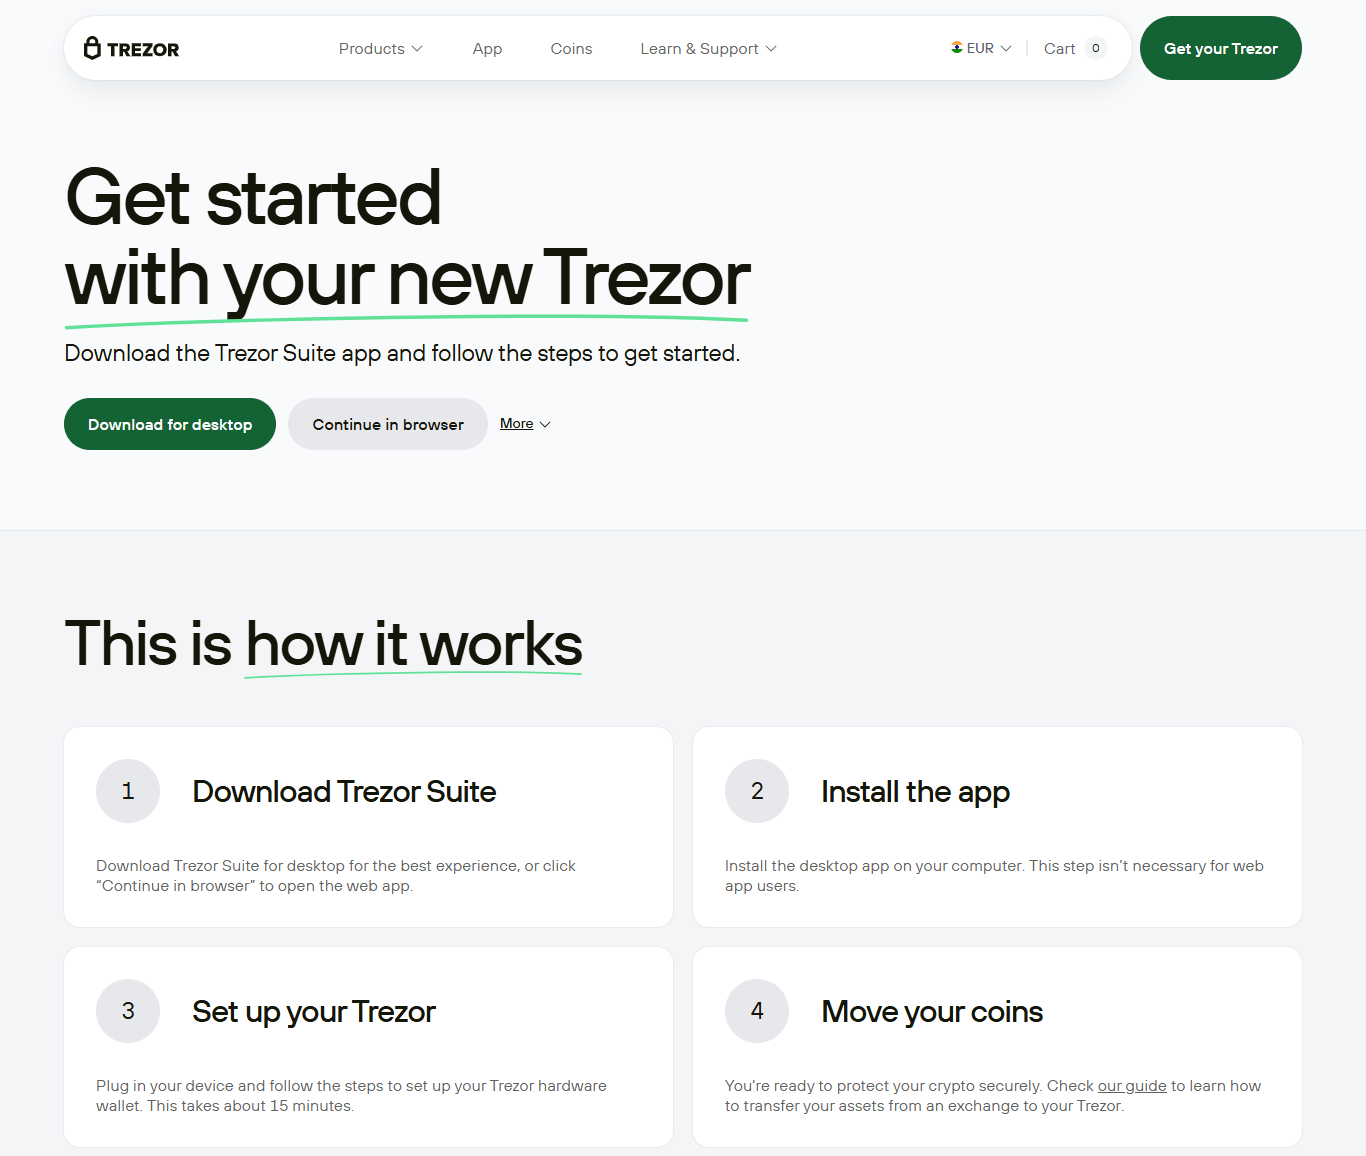
4. Initializing Your Trezor
Here’s the step-by-step process for first-time setup:
Step 1: Connect Your Device
Use the supplied USB cable to connect your Trezor to your computer.
Step 2: Install Trezor Suite
Trezor Suite is the official desktop application for managing your crypto. Download and install it from the official source. It’s available for Windows, macOS, and Linux.
Step 3: Update Firmware
If prompted, install the latest firmware. This ensures you have the newest security features.
Step 4: Create a New Wallet
In Trezor Suite, choose “Create New Wallet”. This generates your private keys securely inside the device.
Step 5: Backup Your Recovery Seed
Your Trezor will display a 12, 18, or 24-word recovery seed.
Write it down on the provided recovery sheet.
Never store it digitally or take photos.
Keep it in a secure, fireproof location.
Important: Anyone with your recovery seed can access your funds. Treat it like your most valuable possession.
Step 6: Set Your PIN
Choose a PIN code to protect against unauthorized access. The longer and more random, the better.
5. Setting an Optional Passphrase
A passphrase is like an extra password that protects your wallet even if someone has your recovery seed. It’s optional but highly recommended for advanced security. Choose something you can remember but is impossible for others to guess.
6. Adding Your Cryptocurrency Accounts
Once your wallet is initialized:
In Trezor Suite, click “Add Account”.
Choose the cryptocurrency you want to add.
You can manage multiple accounts for different coins within the same device.
7. Receiving Crypto
To receive crypto:
Select the account in Trezor Suite.
Click “Receive” to generate a unique address.
Verify the address on your Trezor’s screen before sharing it.
Share this address with the sender or paste it into an exchange withdrawal form.
8. Sending Crypto
When you’re ready to send:
Select the account in Trezor Suite.
Click “Send” and enter the recipient’s address and amount.
Verify and confirm the transaction on your Trezor device.
The transaction is broadcast to the blockchain.
9. Security Best Practices
Never share your recovery seed.
Always verify addresses on your device screen.
Use a passphrase for sensitive holdings.
Keep firmware updated.
Store your recovery seed in multiple secure locations if possible.
10. Troubleshooting
Problem: Device not detected.
Solution: Try a different USB cable, port, or reinstall Trezor Suite.
Problem: Forgot your PIN.
Solution: You’ll need to wipe the device and restore it with your recovery seed.
Problem: Recovery seed lost.
Solution: Unfortunately, without it, there’s no way to recover your funds. Always keep backups safe.
11. Maintaining Your Trezor
Update firmware regularly.
Review security practices every few months.
Test recovery by restoring on a spare device or in a safe environment.
12. Frequently Asked Questions
Q: Can I store NFTs on Trezor?
A: Yes, using third-party wallet integrations that support NFTs.
Q: What happens if Trezor stops producing devices?
A: Your recovery seed can be imported into other compatible wallets.
Q: Can I use Trezor on mobile?
A: Yes, with certain OTG adapters and supported apps.